@Vitor Lima
In this article, we will learn how to use a dashboard to create Actions for your devices. This is very useful if you want to let your customers set up alert notifications.
By following all the steps here, you will have a dashboard ta can create any action and also will learn:
- Triggering an analysis with the Input Widget.
- Send feedback messages to show up in the Input Widget.
- Setting up a Blueprint dashboard and device tags.
- Triggering an analysis for when someone edits/deletes a line in the Dynamic Table widget.
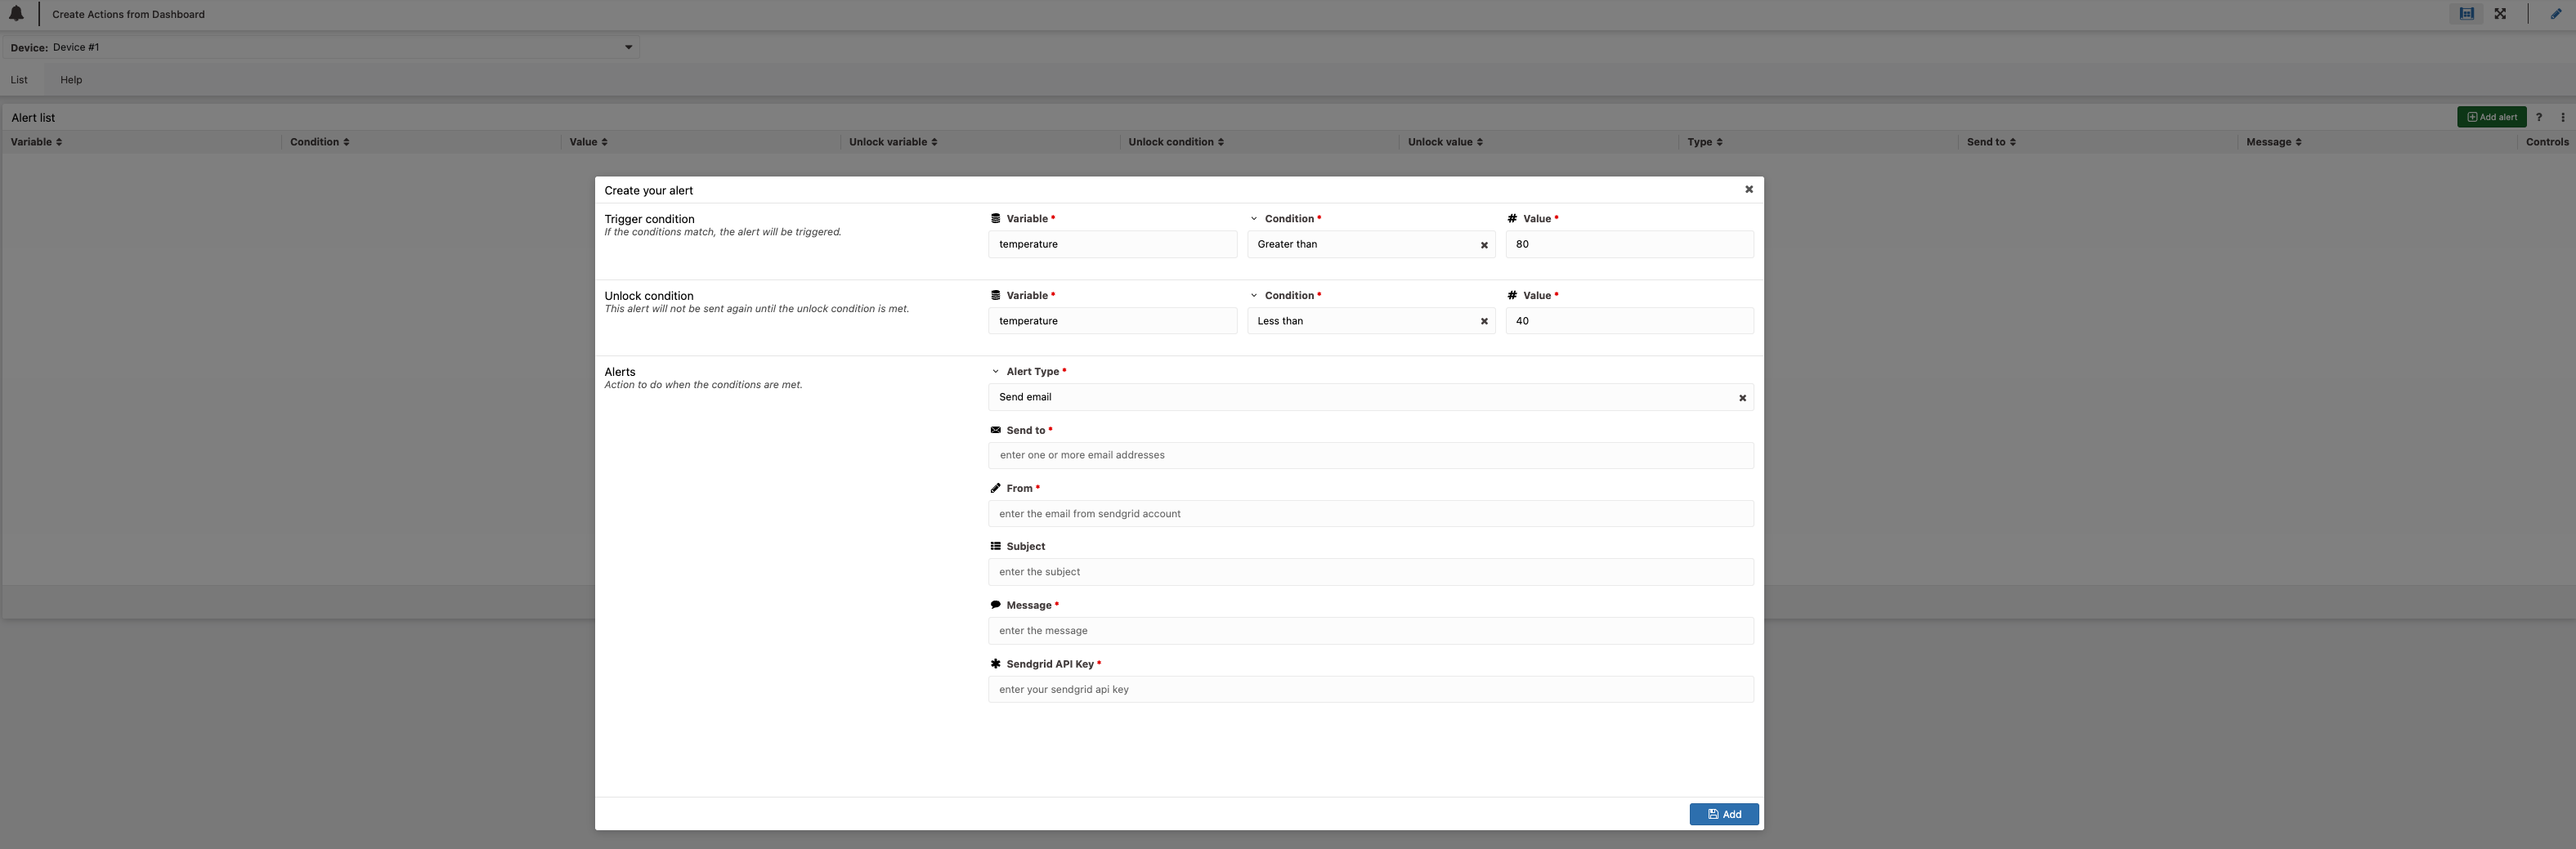
- Create actions for SMS with Twilio, Email with Sendgrid, and Push Notification using analysis.
Step 1: Getting the analysis ready
Let’s start this tutorial by installing the analysis in our account.
Get the analysis template by clicking in this link: https://admin.tago.io/template/68b6dd84259fe90010db06c2
The only thing we need to do here is to set up the Access.
- Enter the following link: Access Management
- Click on Add Policy .
- Fill the Policy Name.
- Set the Target to Analysis with field ID equal to Action using dashboards
- Set three permissions as:
- Allow Action with rules Access, Create, Edit and Delete with field ID any
- Allow Device with rules Access, Send Data and Edit Data with field Tag equal to can_create : actions
- Allow Secrets with rules Create with field ID any

Step 2: Getting the dashboard ready
In this step we will set up the dashboard in our account and understand how it works.
Get the dashboard template by clicking in this link: Dashboard Template
- Confirm the blueprint settings. You can change this later by editting the dashboard if you want to.
- You will be requested to select the analysis for the dashboard. Select the one you installed at Step 1.
By the first look at the dashboard, we can notice it has one tab for List and another for Help.
We can also notice that we can’t select any device here for our dashboard. So this is what we need to handle first.

The placeholder already tells you what to do: You need to go to your devices page, click to your devices, and then add a tag with key can_create and value actions. That is needed because we are using a Blueprint Dashboard, and the devices used for the widgets are dynamically changed by the Device dropdown. You can see/change the setup by editing the dashboard.

So, go to one of your devices and add the tag key and tag value as follow:

Now if we go back to the dashboard, we will be able to select the device we added the tag. To add more devices to the list, just add the same tag to other devices.
As you’re a developer, you can click to edit the dashboard to notice another hidden tab, that we use to hide the input form widget.
![]()

So let’s undestand how this works.
- You have a Tab of type Hidden Dashboard.
- You have a widget in this tab.
- You have a Dynamic Table in the List dashboard.
- You have a header in the Dynamic Table that opens the widget from the Hidden Dashboard.
Step 3: Giving permission for end-users to access the dashboards
I’m assuming you already have the TagoRUN enabled in your account. If you don’t, just click in the Run button in your sidebar, and it will generate a URL to login in your TagoRUN, like that: https://5bbcb03b667d7a002e56664b.run.tago.io
To log in through the TagoRUN, you need to have users in your account. Your developer’s username and password will not work here.
In your developer’s account, you must click in the Users button in your sidebar, and you can create new users.
Now click the button Access at your sidebar. Here you can create a policy, that will determine what the user has access to.
For a very simple example, you can copy the following policy for this tutorial:
- Enter a name for the policy.
- Set the Target to Run user with field ID equal to Your user
- Set two permissions as:
Allow Dashboard with rules Access with field ID equal to Your Dashboard
Allow Device with rules Blueprint Access with field Tag equal to can_create : actions

Now you have all set up and can start using the dashboard to create alerts!
You can personalize this example to your application based on your needs. You can remove fields that you don’t plan to use, or create a new widget with less freedom on what the user can set up. It’s your choice!